Today, I want to show you how to install and assemble DIY infrared remote control LED kit from ICStation. Press the switch button or any infrared remote controller on PCB to turn ON or OFF the lamp. For your information, this video is not sponsored.
Installation
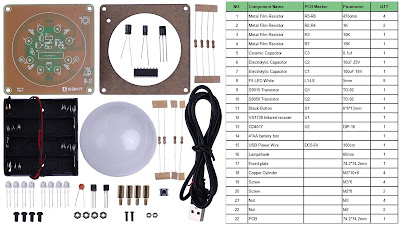
- Unboxing packaging DIY Kit Infrared Remote Control from ICStations. Below are the components lists.
- Install 8 LEDs at L1-L8. Note: the longer pins are positive, and the short pins are negative. Insert the longer pin into the inner ring pad and the short pin into the outer ring pad.
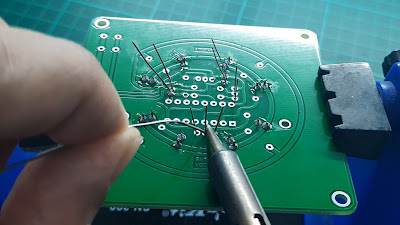
- Solder the LEDs and cut any excess length of pins.
- Install S9015 and S8050 transistors at Q1, 100uF, and 10uF electrolytic capacitors at C1 and C2. Then, install a 1uF ceramic capacitor at C3.
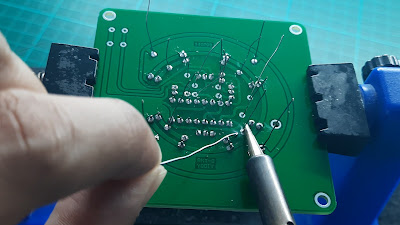
- Solder the transistors and capacitors and cut any excess length of pins.
- Install IC CD4017 in U6 and solder it. Note: make sure to follow IC footprint marks on PCB.
- Install VS1738 IR receiver at U2. Solder and cut any excess length of pins.
- Install the 470Ω resistor at R5-R8, 1kΩ resistor at R2 and R4, 10kΩ and 15kΩ resistor at R3 and R1.
- Solder the resistors and cut any excess length of pins.
- Install a button switch at S1 and a battery box or a USB power wire. Note: the red wire connects to ‘+’, and the black wire connects to ‘-’. Solder the button and battery box wire.
- Insert the battery and test the button switch. One of the LEDs was damaged at L6. But, I do not have any spare LED to replace.
- Next, test using IR remote. Seem all functions working normally.
- Install battery box on PCB using M2 screw and nuts. Manage the battery wire using tape.
- Separate the protective film on the black acrylic surface.
- Install M3 copper cylinders and M3 nuts on PCB.
- Install lampshade and fix it using the fixed plate and M3 screws.
- Insert the battery.
- The DIY Kit Infrared Remote Control works like a charm.
The link tools and components replacement I used in this video are listed below:
Tools/Components/Items (Shopee):
Tools/Components/Items (Lazada):
- Screwdriver Set
- Plier Set
- Solder Core Wire (0.6mm)
- Solder Flux
- Tweezer ESD
- Rework Station (SAIKE 952D)
- Multimeter UT89XD
- Infrared (IR) Remote Control
Video:
That all from me. If you have any suggestions, please write in the comment section. Thank you for your time 👷.


No comments:
Post a Comment