Friday, February 24, 2023

Troubleshooting Motorcycle Turn Signal Issues | SYM 125 Jet Power

Welcome to our tutorial on fixing a common problem with motorcycle turn signals. As a motorcycle rider, you know how important it is to have functioning turn signals to communicate your movements to other drivers on the road. But what do you do when your turn signal doesn't blink when you speed up? Don't worry. We've got you covered!

Left signal problem due to winker relay

In this post, we'll take you through the most common causes of this issue and provide a step-by-step guide on diagnosing and fixing the problem. Let's get started.

Step 1: Diagnosis

  1. Remove the front handle cover. Click HERE to learn how to remove the handle front cover.
    Check wiring and connection

  2. After diagnosing our motorcycle, the wiring seems okay, and the only issue could be a faulty winkey relay.

Step 2: Remove Winkey Relay

  1. Remove the faulty relay and replace it with a new winker relay.
    Remove the faulty winker relay

Step 2: Install Winkey Relay
  1. Install the winkey relay in order of removal.

    Install new winkey relay

Step 8: Test
  1. Start the engine and test out the signal function.

    The turn signal works normally again.

You can find a list of tools and materials to purchase below:

Tools/Components/Items (Shopee):

  1. Screwdriver Set
  2. Spanner Set

Tools/Components/Items (Lazada):
  1. Screwdriver Set
  2. Spanner Set
Tools/Components/Items (Aliexpress):
  1. Screwdriver Set
  2. Spanner Set

Video:


That's all from me. If you have any suggestions, please write in the comment section. Thank you for your time 👷.

Tuesday, February 21, 2023

The Advantages of Solar Power: Increasing Efficiency and Decreasing Costs as Key Drivers for a Cleaner Future

Solar energy is gaining popularity as a renewable power source for many reasons. Solar panel efficiency has improved, and the costs have decreased, making it more accessible worldwide. An important benefit of solar energy is that it is a clean and renewable energy source that does not emit harmful pollutants or greenhouse gases. Solar panels convert the sun's energy into usable power, making them ideal for fighting climate change and reducing dependence on fossil fuels.

Solar Panels (Source: pexels.com)

Advances in solar cell technology have led to significant improvements in the efficiency of solar panels, enabling them to generate more power from the same amount of sunlight. The most efficient solar panels on the market today can convert more than 20% of the sun's energy into usable power. Solar panel costs have also been decreasing thanks to advancements in manufacturing technology, improvements in solar cell efficiency, and economies of scale. In many parts of the world, solar energy is cheaper than traditional fossil fuel sources.

The combination of increasing efficiency and decreasing costs is making solar power a more practical and accessible source of energy worldwide. In addition to reducing reliance on fossil fuels, solar power has the potential to create jobs and boost local economies. It is already providing clean and affordable energy to remote and underdeveloped communities.

However, solar power can be less reliable than traditional fossil fuels as it relies on weather and time of day. Energy storage systems and smart grid technology are being developed to overcome this issue. As technology continues to improve and costs continue to fall, solar power has the potential to play a significant role in reducing reliance on fossil fuels and combating climate change.

Monday, February 20, 2023

Get Your Arduino Projects Connected with These 10 4G Modules Supporting Global Networks

With the rise of the Internet of Things (IoT) and machine-to-machine (M2M) communication, there is an increasing demand for reliable and high-speed wireless connectivity. 4G LTE is popular for IoT and M2M applications due to its high-speed data transfer rate and wide coverage. In this blog post, we will look at 10 4G modules that support Arduino, a popular microcontroller platform for prototyping and developing IoT and M2M applications.


SIM7600X Module (Source: www.simcom.com)


  1. SIM7600CE 4G LTE Arduino Shield - The SIM7600CE 4G LTE Arduino Shield is a 4G LTE shield for Arduino based on the SIM7600CE module. It supports global LTE-FDD, LTE-TDD, DC-HSPA+, HSPA+, HSDPA, HSUPA, WCDMA, and GNSS networks. The shield has a compact form factor and supports multiple interfaces, such as UART, USB, and I2C.

  2. Dragino LTE CAT-M/NB-IoT Shield - The Dragino LTE CAT-M/NB-IoT Shield is a 4G LTE shield for Arduino based on the Quectel BG96 module. It supports global LTE CAT-M1 and NB-IoT networks. The shield has a compact form factor and supports multiple interfaces, such as UART, USB, and GPIO.

  3. Seeed Studio Wio LTE Cat.1 - The Seeed Studio Wio LTE Cat.1 is an Arduino-compatible board with built-in 4G LTE connectivity based on the Quectel EC21 module. It supports global LTE-FDD, LTE-TDD, DC-HSPA+, HSPA+, HSDPA, HSUPA, and GNSS networks. The board has a compact form factor and supports multiple interfaces, such as UART, USB, and I2C.

  4. Pycom GPy - The Pycom GPy is an Arduino-compatible board with built-in 4G LTE connectivity based on the Sequans Monarch module. It supports global LTE CAT-M1, NB-IoT, and 2G networks. The board also has built-in Wi-Fi and Bluetooth connectivity and various sensors. It supports multiple interfaces, such as UART, SPI, and I2C.

  5. SODAQ SARA AFF R410M - The SODAQ SARA AFF R410M is a 4G LTE shield for Arduino based on the u-blox SARA-R410M-02B module. It supports global LTE-M and NB-IoT networks. The shield has a compact form factor and supports multiple interfaces, such as UART, USB, and I2C.

  6. Mikroe 4G LTE Click - The Mikroe 4G LTE Click is a 4G LTE module for Arduino based on the Quectel EC25 module. It supports global LTE-FDD, LTE-TDD, WCDMA, and GSM/GPRS/EDGE networks. The module has a compact form factor and supports multiple interfaces, such as UART, USB, and SPI.

  7. Sixfab LTE Shield for Raspberry Pi and Arduino - The Sixfab LTE Shield is a 4G LTE shield for both Raspberry Pi and Arduino. It is based on the Quectel EC25 module and supports global LTE-FDD, LTE-TDD, WCDMA, and GSM/GPRS/EDGE networks. The shield has a compact form factor and supports multiple interfaces, such as UART, USB, and GPIO, making it highly customizable and adaptable to different use cases.

  8. SparkFun LTE CAT M1/NB-IoT Shield - SARA-R4 - The SparkFun LTE CAT M1/NB-IoT Shield is a 4G LTE shield for Arduino based on the u-blox SARA-R410M module. It supports global LTE CAT-M1 and NB-IoT networks. The shield has a compact form factor and supports multiple interfaces, such as UART, I2C, and SPI.

  9. Particle Boron LTE - The Particle Boron LTE is an Arduino-compatible board with built-in 4G LTE connectivity based on the u-blox SARA-R410M module. It supports global LTE CAT-M1 and NB-IoT networks. The board also has built-in Wi-Fi and Bluetooth connectivity, as well as various sensors. It supports multiple interfaces, such as UART, I2C, and SPI.

  10. DFRobot SIM7600CE 4G LTE Arduino Shield - The DFRobot SIM7600CE 4G LTE Arduino Shield is a 4G LTE shield for Arduino based on the SIM7600CE module. It supports global LTE-FDD, LTE-TDD, DC-HSPA+, HSPA+, HSDPA, HSUPA, WCDMA, and GNSS networks. The shield has a compact form factor and supports multiple interfaces, such as UART, USB, and I2C.

With these 10 4G modules that support Arduino, developers can easily add 4G connectivity to their IoT and M2M projects. These modules support various network frequencies and are compatible with a range of Arduino boards, making it easy to integrate them into existing designs. The compact form factor and support for multiple interfaces also make it easy to prototype and develop custom applications. Whether you're working on a smart home system, a remote monitoring solution, or an industrial automation project, these 4G modules can help you achieve reliable and high-speed wireless connectivity.

Sunday, February 19, 2023

Electrical Safety First: Understanding RCCB and ELCB Circuit Breakers

Electricity is a critical resource that powers our daily lives. However, it can be hazardous if not handled properly. One way to ensure electrical safety is to install circuit protection devices, such as Residual Current Circuit Breakers (RCCBs) and Earth Leakage Circuit Breakers (ELCBs). These devices may appear similar, but they have distinct differences that set them apart.


MAXGUARD RCCB 40A (Source: MAXGUARD)


An RCCB is an electrical safety device that automatically shuts off the power supply when it detects an imbalance in the electric current flowing through a circuit. This imbalance, known as a residual current, results from a leakage of current caused by an electrical fault or shock. RCCBs can detect even a small amount of residual current, as low as 10 milliamps, and disconnect the power supply within milliseconds to prevent electrocution. RCCBs are installed in the distribution board and operate by comparing the current flow in the live and neutral wires. If the current is not equal, it indicates a leakage, and the RCCB disconnects the power supply. RCCBs are sensitive devices and can detect both AC and DC currents.

On the other hand, an ELCB is a circuit protection device that protects against electrical shock and fire hazards caused by earth leakage current. Earth leakage current is a current that flows through the earth wire when there is a fault in the electrical circuit. ELCBs can detect this current and shut off the power supply within milliseconds. Unlike RCCBs, ELCBs operate by comparing the current flowing in the live wire and the earth wire. If the current in the earth wire exceeds a set limit, it indicates a fault, and the ELCB disconnects the power supply. ELCBs are only suitable for AC current and do not provide protection against DC current.

The primary difference between RCCBs and ELCBs is the type of current they can detect. While RCCBs can detect AC and DC currents, ELCBs can only detect AC currents. RCCBs detect imbalances in the current flowing in the live and neutral wire, while ELCBs detect current flowing in the live and earth wire. Additionally, RCCBs are more sensitive and can detect even a small amount of residual current, while ELCBs have a set limit for the earth leakage current they can detect.

In conclusion, both RCCBs and ELCBs are crucial devices that protect against electrical hazards. RCCBs are versatile and sensitive, making them suitable for a wide range of applications, while ELCBs are more limited in their functionality but provide reliable protection against earth leakage current. It is important to choose the appropriate circuit protection device based on the specific needs of the electrical circuit, and a qualified electrician should be consulted to ensure the right device is installed.

Saturday, February 18, 2023

Understanding IEC Guidelines for Earth Resistance in Electrical Installations

Effective earth resistance is critical in ensuring electrical installations' safety and proper functioning. The International Electrotechnical Commission (IEC) has published several standards related to the design and installation of earthing systems. These standards ensure the safety of electrical installations and the personnel who work with them. One of the most important standards related to earth resistance is IEC 60364-5-54.


Digital Earth Tester KEW 4105DL-H (Source: www.kew-ltd.co.jp) 


IEC 60364-5-54 provides guidance on selecting and installing earthing systems for electrical installations. The standard specifies the maximum allowable earth resistance for different types of electrical installations. For example, the maximum allowable earth resistance for low-voltage installations is 166.7 ohms, while for high-voltage installations, the maximum allowable earth resistance is 10 ohms.

The earth resistance is the resistance of the earth electrode, a conductor buried in the ground that connects the electrical installation to the earth. A low earth resistance helps limit the voltage rise that can occur during a fault and reduces the risk of electrical shock. Factors that affect the earth resistance of an earthing system include the type of soil, the depth and length of the earth electrode, and the moisture content of the soil. To measure the earth's resistance, an earth tester is used. This instrument applies a known voltage to the earth electrode and measures the resulting current. The earth resistance can then be calculated as the ratio of voltage to current, according to Ohm's law.

In conclusion, the IEC provides essential guidelines for selecting and installing earthing systems, including the maximum allowable earth resistance for different types of electrical installations. Earth resistance is a critical factor in ensuring the safety and reliability of electrical installations. Understanding and complying with these guidelines is essential for the safety of electrical installations and the personnel who work with them.

Friday, February 17, 2023

Smart Manufacturing and the Future of SMT Electronics in the Industry 4.0 Era

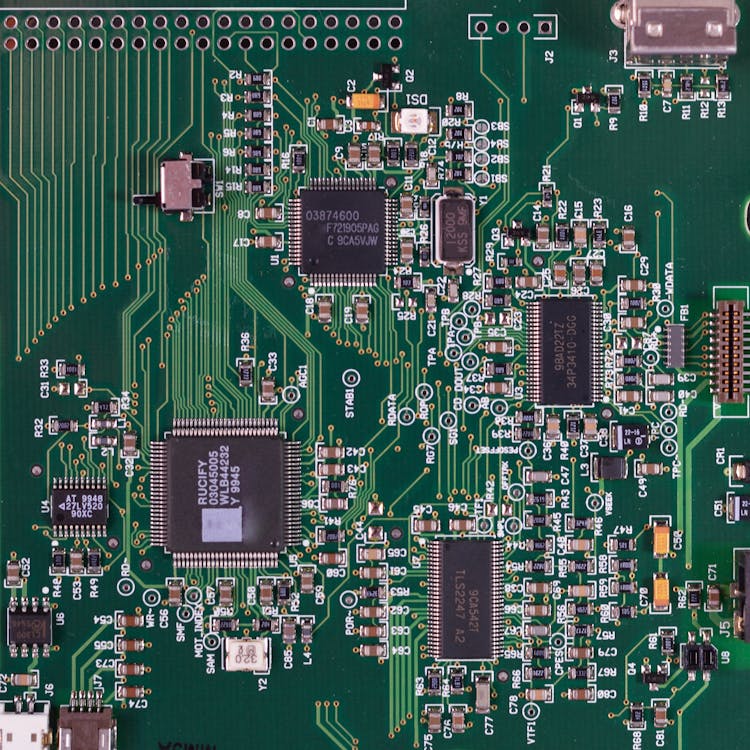
Industry 4.0, the integration of digital technologies into manufacturing, is having a significant impact on the electronics industry, especially in Surface Mount Technology (SMT). SMT is a technique where electronic components are mounted directly onto the surface of a printed circuit board (PCB), widely used in modern electronics. Industry 4.0 is transforming how SMT electronics are manufactured, making the process more efficient, cost-effective, and reliable.


SMT board (Source: pexels.com)


In SMT electronics, Industry 4.0 integrates data analytics, automation, and real-time monitoring. By collecting and analyzing large amounts of data in real time, manufacturers can identify and address issues more quickly, leading to increased efficiency and reduced costs. Automation reduces the need for human intervention, improving efficiency and reducing errors. Real-time monitoring uses sensors to quickly identify and address issues before they become significant problems.

Smart manufacturing is transforming the industry in several ways, including improving efficiency, increasing flexibility, enhancing quality control, and reducing costs. Manufacturers can reduce production times and improve overall efficiency by automating and streamlining the manufacturing process. Smart manufacturing allows for greater flexibility in production, adjusting the process in real-time to respond to changing demand. Real-time monitoring and data analytics identify quality issues more quickly, improving product quality. By improving efficiency and reducing waste, smart manufacturing can lead to significant cost savings.

The SMT electronics industry is evolving, and smart manufacturing will likely become more prevalent. As the industry continues to advance, we can expect further advancements in SMT electronics.

Thursday, February 16, 2023

Exploring the Benefits and Challenges of IoT Technology

The Internet of Things (IoT) is a technology that connects devices to the internet and enables them to collect and share data. IoT has become increasingly prevalent in recent years, with applications ranging from smart homes to industrial sensors. While IoT offers many benefits, such as increased efficiency and new opportunities for data analysis, it also presents several challenges and concerns.


Connectivity using fiber optic (Source from pexels.com)

One of the primary advantages of IoT is its ability to automate and optimize processes. IoT devices can adjust settings based on user preferences and behavior, resulting in increased efficiency and improved outcomes. For example, a smart thermostat can adjust the temperature based on the user's schedule and behavior, resulting in lower energy costs and a more comfortable living environment. In addition, businesses can benefit from the data collected from IoT devices, gaining insights into customer behavior, optimizing supply chain management, and improving product design and development.

However, IoT also raises concerns about privacy and security. The data collected by IoT devices often include personal information, which cybercriminals can exploit. Several high-profile security breaches in recent years have highlighted the need for stronger security measures and data protection policies. Users and businesses need to take steps to secure their IoT devices, such as using strong passwords and keeping devices up to date with the latest security patches.

Interoperability is another challenge facing IoT. Different devices often use various platforms and protocols, making it difficult to integrate devices and share data between systems. This limits the potential benefits of IoT and can result in siloed data that is not easily accessible or actionable.

Despite these challenges, IoT has the potential to revolutionize industries and improve our quality of life. It's important to address the concerns about privacy and security and ensure that the technology is used ethically and responsibly. IoT can make our daily lives more convenient with the proper infrastructure and policies and provide new business insights. As IoT continues to evolve, staying informed and updated on the best security and data protection practices is essential.

Wednesday, February 15, 2023

The Ultimate Guide to Cleaning Your Carburetor | SYM 125 Jet Power Motorcycle

Are you experiencing difficulty with your SYM 125cc scooter or motorcycle? One common issue is a dirty carburetor, which can cause poor engine performance and decreased fuel efficiency. Fortunately, regular cleaning and maintenance can prevent these issues and keep your engine running smoothly.


SYM 125 Jet Power Carburetor

This tutorial will guide you through the step-by-step process of disassembling and cleaning the SYM 125 Jet Power carburetor. Our guide includes a list of tools and materials you'll need and time stamps for each step, so you can follow along easily.


Step 1: Remove Carburetor

  1. Remove the luggage box. Click HERE to learn how to remove the luggage box.
  2. Unclamp the carburetor isolator, detach the fuel pipe and vacuum hose, and loosen the adjustment nut and fixing nut of the throttle valve cable to release it from the carburetor.
    Remove fixing nut
  3. Release the clamp strip of the air cleaner. Disconnect the auto-by-starter connectors and take the carburetor out.

    Take out carburetor

Step 2: Remove Auto by Starter
  1. Take out the screw from the fixing plate, then remove the plate and the auto by-starter
    from the carburetor.

    Auto by starter taken out

  2. Remove the auto by-starter chamber.

    Auto by starter chamber

Step 3: Remove the Vacuum Chamber
  1. Loosen the drain screw to drain the residual fuel in the float chamber. Remove the two screws of the vacuum chamber cover and take off the cover.

    Unscrew vacuum chamber

  2. Remove the compression spring and the vacuum piston

    Vacuum piston with compression spring

Step 4: Remove Float Chamber
  1. Remove the 4 screws holding the float chamber cover.

    Remove the float chamber cover

  2. Remove the components of the main jet, fuel needle jet holder, fuel needle jet, slow jet,
    and the screw for adjusting the fuel amount.

    Remove the fuel needle jet holder

Step 5: Remove Air Cut-Off Valve
  1. Remove the clamp on the vacuum hose, then take out the hose.

    Remove clamp

  2. Remove the clamp on the vacuum hose, then take out the hose.

    Unscrew the air cut-off valve cover

  3. Remove the screws securing the air cut-off valve and its cover, then take out the spring
    and vacuum diaphragm.

    Remove the spring and vacuum the diaphragm

Step 6: Clean and Dry
  1. Clean carburetor components using an ultrasonic cleaner filled with water, dish soap or detergent powder, and fuel.
    Cleaning using ultrasonic cleaner
  2. Blow out all residual water from the components using compressed air, and let them dry in the sun.

    Blow using compressed air

Step 7: Install the Carburetor Components
  1. Install the carburetor components in reverse order of removal.

    Carburetor installation

Step 8: Test
  1. Start the engine. In the next tutorial, I'll show you how to tune the carburetor.

    Start the motorcycle

You can find a list of tools and materials to purchase below:

Tools/Components/Items (Shopee):

  1. Screwdriver Set
  2. Spanner Set
  3. Ultrasonic Cleaner 6L

Tools/Components/Items (Lazada):

Video:


That's all from me. If you have any suggestions, please write in the comment section. Thank you for your time 👷.