Wednesday, September 27, 2023

Repairing a Keyboard Wire Chewed by a Mouse - Step-by-Step Guide

Let's kick things off with a classic "uh-oh" moment. You're all set to type away on your computer, but guess what? Your trusty keyboard is acting up, thanks to a certain sneaky mouse who decided to take a nibble out of its wire. Annoying, right? 

The keyboard was chewed by a pesky mouse!

Well, here's the good news: you're in the right place. In this simple, no-nonsense guide, we're going to show you how to fix that chewed-up keyboard wire with no tech wizardry required. It doesn't matter if you're a tech pro or just someone with a curious streak – we've got your back. 

So, let's roll up our sleeves and get that keyboard back to its old, clickety-clackety self. Time to outsmart that pesky mouse! 🛠️🖱️💻🐭


Step 1: Disassembly

Start by disassembling the keyboard using a screwdriver to carefully remove all internal components.

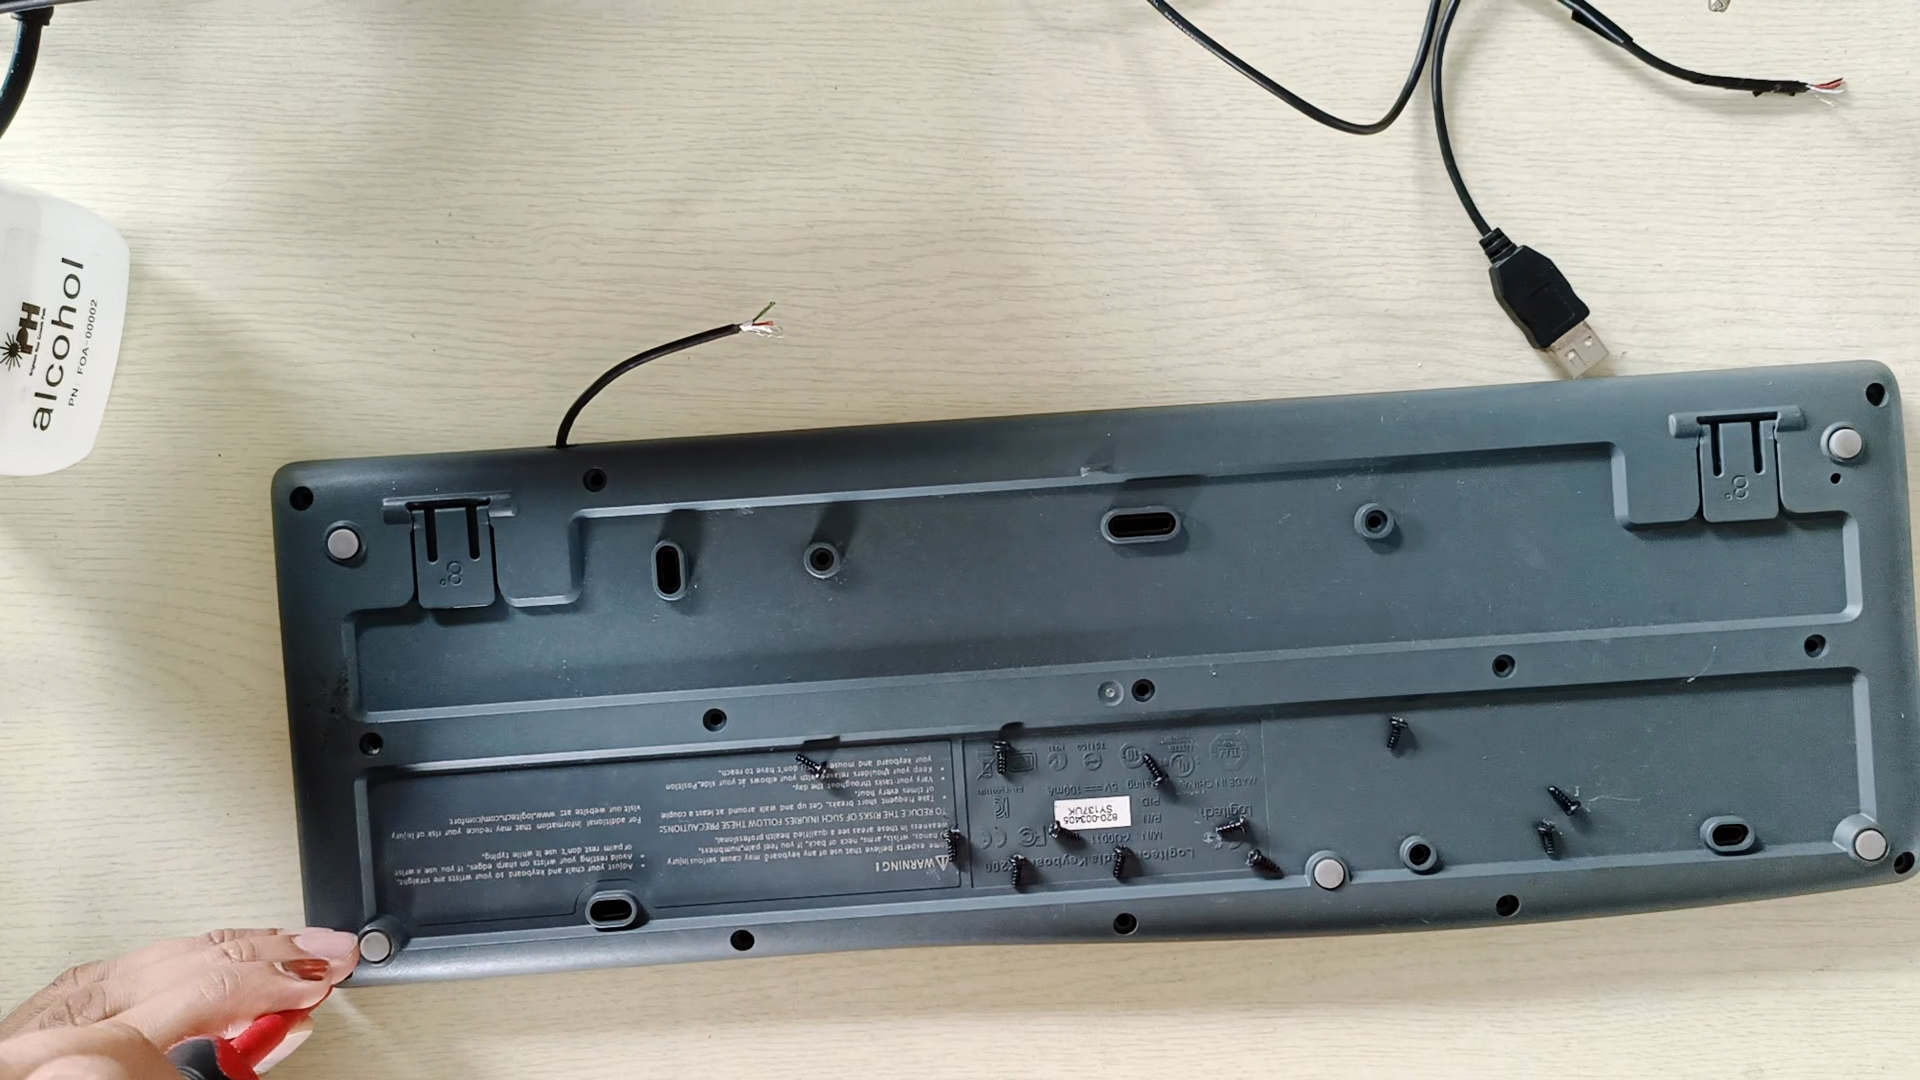
Removing a screw from the back of the keyboard.

Step 2:  Prying Open the Covers

Gently pry open the top and bottom covers of the keyboard. You can use a dedicated pry tool or a Philips screwdriver. 

Be patient and work your way around the edges to avoid causing damage.

Removing all internal components.

Step 3: Cleaning

Use compressed air or a soft brush to thoroughly clean any dust or debris inside the keyboard.

Use a soft brush to remove any debris.

Step 4: Repairing the Wire

Desolder the broken wire from the PCB (printed circuit board).

Desolder attached the wire from the PCB.

Replace it with a new wire of the exact length. Measure the length of the damaged wire accurately.


Strip the wire ends and solder them back onto the PCB, ensuring proper insulation.

Step 6: Reassembly

Carefully put all the internal components back in their original positions.

Install in reverse order of removal.

Step 7: Test

Test the repaired keyboard to ensure it's working correctly. It should type normally once again.

Congratulations! You've successfully repaired your keyboard wire damaged by a pesky mouse.


The link tools and components replacement I used in this video are listed below:

By adhering to this easy-to-follow walkthrough, you've triumphantly brought your keyboard back from the brink of despair caused by that sneaky mouse. Routine maintenance, careful cleaning, and prompt repairs can go a long way in ensuring your equipment's durability. As reliable as your trusty keyboard, your engagement means the world to us.

If this guide proves useful in your keyboard-saving mission, be sure to share it with others who may find themselves in a similar predicament. Cheers to successful repairs and hassle-free typing! 🛠️🖱️💻🐭

Monday, September 4, 2023

Revive Your Remote Fan: Repairing Corrosion at the Battery Terminal | Easy DIY Guide

Remote fans provide much-needed comfort and convenience but are not immune to issues that can arise over time. One common problem is corrosion at the battery terminal, which can hinder the fan's performance and even cause damage to its components. This comprehensive guide will walk you through repairing a remote fan with corrosion at the battery terminal. Whether you're a seasoned DIY enthusiast or just looking to save a beloved appliance, this guide covers you.

Thumbnail remote fan video

Step 1: Open the Remote Fan Casing

The first step is to gently pry open the casing of the remote fan using a small flathead screwdriver or a pry tool. Start at a corner and carefully work around the edges to separate the front and back casing.

The back side of the remote fan

Inspect the battery terminals and components for signs of corrosion. Corrosion often appears as a greenish or white buildup on the metal contacts.

Remove the battery cover and battery. 

Pry the casing.

Separate the casing using a flat screwdriver. 

Step 2: Access Internal Components

After opening the casing, lay the internal components on a clean surface. If screws hold the PCB, remove them using a Phillips screwdriver. Lift the PCB and other features that are secured inside the casing.

Remove PCB.

Remove keypad.

Step 3: Clean the PCB and Components

Gently disconnect any wire connections (if applicable) from the PCB. Use isopropyl alcohol and cotton swabs to clean the PCB and components, removing corrosion, dirt, or debris. Pay close attention to the battery terminal areas and wipe down plastic parts.

Clean keypad, PCB, and casing.

Step 4: Repair the Corroded Areas Using Corrosion Solution

If corrosion has affected the coil or plate in the battery compartment, apply a small amount of corrosion solution to a cotton swab. Apply the solution to corroded areas and gently scrub to remove corrosion. 

Spray the corrosion solution on the corroded areas.

Most of the corrosion is on the spring and flat plate of the battery terminal.

Use fine-grit sandpaper for stubborn residues.

Step 6: Assemble the Keypad, PCB, and Close the Casing

Align the keypad and PCB, making sure buttons match up with corresponding areas. Gently place them back into the casing. If screws held the PCB, reinsert and tighten them.

Align the keypad and PCB.

Tighten the screw using Philip's screwdriver.

Insert the battery and test before closing the casing.

Align and press the casing edges to ensure a secure fit.

Step 7: Test

Turn on the remote fan and test its functionality. Observe performance for any irregularities.

Test all functions of the remote fan.

The link tools and components replacement I used in this video are listed below:

By following this step-by-step guide, you've successfully revived your remote fan from the clutches of corrosion. Regular maintenance, cleaning, and timely repairs can significantly extend your appliance's lifespan. Remember, your engagement is invaluable – just like the breeze this remote fan will provide once again. If you found this guide helpful, don't forget to share it with fellow enthusiasts. Happy repairing!