Today, I want to show you how to diagnose and repair scooter SYM Jet Power 125 hard to crank/start/not charging the battery due to a faulty regulator rectifier. Common symptoms of the faulty regulator or rectifier, e.g., low battery voltage and charging system failure.
References:
Step 1: Diagnosis motorcycle
- My battery is not charging even when I start the motorcycle and can cause a low voltage/dead battery.
- You can see the battery voltage at 12.22 V and not increasing.
- After the diagnosis of my motorcycle, I found that my charging system had failed. 4 common places that need to be troubleshot are the alternator, regulator, fuse, and wiring/connector.
Step 2: Removal of regulator/rectifier
- Disassemble the body cover in sequence 1 → 2 → 3 as shown in the figure below. You can watch my previous video or post on how to remove body cover step by step.
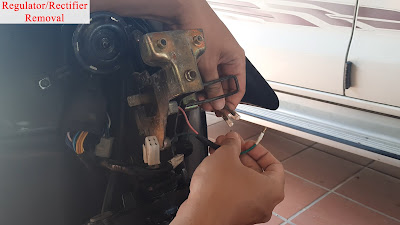
- Remove the regulator/rectifier mounting bolt.
- Disconnect the 4P connector on the regulator/rectifier.
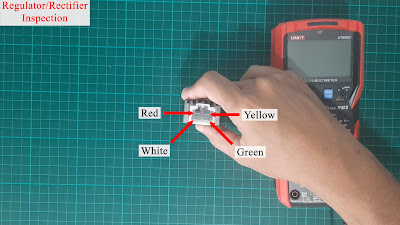
- Check the resistance of the regulator/rectifier.Check the resistance between the terminals according to the table above. Make sure the positive and negative probe incorrect position according to the table.If the resistance values are exceeded or less than the standard value among the pins, replace the regulator/rectifier. In my case, my value is the open load or open circuit (OL). So I need to replace this regulator/rectifier.
Step 2: Installation
- Install the new OEM regulator/rectifier in the reverse order of removal.
- Start and take the reading with a multimeter. You can see from the picture below the reading around 13 V ++ compared to before replacing the regulator rectifier.
The link tools and components replacement I used in this video are listed below:
Tools/Components/Items (Shopee):
Tools/Components/Items (Lazada):
Tools/Components/Items (Aliexpress):
Video:
That all from me. If you have any suggestions, please write in the comment section. Thank you for your time 👷.


No comments:
Post a Comment