
Today, I will share how to control LEDs using Blynk web or apps via the internet. The microcontroller used in this project is Nodemcu V3 (ESP8266).

Related Post:
References:
Steps:
- Prepare 2 LEDs, 2 resistors (220), breadboard, and Nodemcu module.

- Connect LED from pin D1 and D2 Nodemcu to the GROUND through a 220 Ω resistor.

- Connect micro USB to Nodemcu module.

- Go to the blynk.io website and log in. If you do not have an account yet, click "Create new account".


- Create New Template > Type NAME "Control LED" > Select HARDWARE "ESP8266" > Select CONNECTION TYPE "WiFi" > Done.


- Go to Datastreams Tab> New Datastream > Virtual Pin > Type NAME "LED" > Select PIN "V0" > Select DATA TYPE "Integer" > DEFAULT VALUE "0" > Create.


- Click New Datastream again > Virtual Pin > Type NAME "LED2" > Select PIN "V1" > Select DATA TYPE "Integer" > DEFAULT VALUE "0" > Create.

- Go to Web Dashboard Tab > Select Switch widget to the canvas. Repeat again for another switch widget.


- Go to Switch widget setting > Select Datasteam LED (V0) > Slide Show on/off labels > Type ON LABEL "ON" and OFF LABEL "OFF" > Save.

- Repeat again for another switch widget > Select Datasteam LED2 (V1) > Slide Show on/off labels > Type ON LABEL "ON" and OFF LABEL "OFF" > Save. Then, Save the Web Dashboard.

- Open Arduino IDE and go to Sketch > Include Library > Manage Libraries... > Type "blynk" > Enter. Go to Blynk tab > Select the latest version > Install > Close. Library code click HERE.

- Back to Blynk.io website > Select Info Tab > Copy FIRMWARE CONFIGURATION.

- Open the Controlled LED coding project and paste the FIRMWARE CONFIGURATION. Click HERE to download the project code.

- Verify and upload the project.

- Download and Log In Blynk IoT app on Google Playstore.

- Click Connect to Wi-Fi.

- Click Ready and connect Blynk Control LED WiFi.


- Click Grant permission > Select "Only this time" > Select your WiFi network.


- Type your WiFi password and click Continue.

- Click Continue > Click Continue > Click Done >Click OK,great! > Click Finish and exit.


- Click Setup Dashboard > Click ≡ > Select Button Widget.


- Add another Button Widget. Rearrange Button Widget.

- Click Button Widget > Select Datastream "LED" > Select MODE "SWITCH" > Click back arrow "←".

- Click Button 2 Widget Widget > Select Datastream "LED2" > Select MODE "SWITCH" > Click back arrow "←". Lastly, exit the canvas.


- Test from Phone apps.

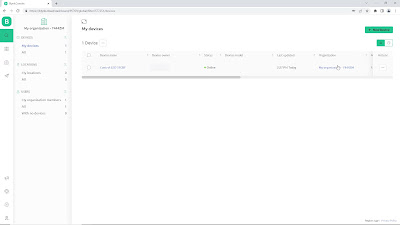
- To test from the website, go to the 🔍 icon at Tab > Click My devices > Click My Organization > Click Control LED 57CBF.


The tools/components I used in this post are listed below:
Shopee:
Lazada:
Aliexpress:
Video:
If you have any suggestions, please write in the comment section. Thank you for your time 👷.
No comments:
Post a Comment