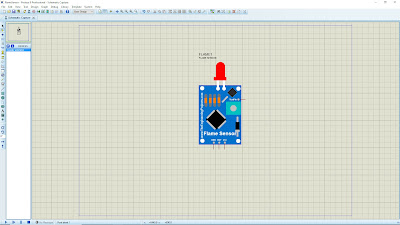
Hi guys, today I will share how to add, use and interface the flame sensor library in Proteus 8 software. The library is based on a flame sensor from TEP. A simple project code was created by me to detect fire or flame from a flame sensor.
Flame Sensor Applications:
- Fire detection
- Fire alarm
- NPG storage
- Engine room
- Flame monitors
- Power station
- Etc
Components:
- Flame sensor
- Arduino
- Resistor
- LED
Steps (Flame Sensor Library)
- Download the Flame Sensor library file at TheEngineeringProjects.com or click the link HERE. The download link will appear after 20 seconds.
- You will find three files and one folder on the downloaded zip file, named as:
-FlameSensorsTEP.IDX
-FlameSensorsTEP.LIB
-FlameSensorsTEP.HEX
-Proteus Simulation - Extract FlameSensorsTEP.IDX, FlameSensorsTEP.LIB, and FlameSensorsTEP.HEX files to the Proteus libraries folder (C:\Program Files (x86)\Labcenter Electronics\Proteus 8 Professional\DATA\LIBRARY).
- Open your Proteus software and search for the Flame Sensor component.
- Double click and drag to add to the Proteus 8 workspace.
Steps (Standalone):
- Open your Proteus software and add infrared sensor, resistor, LED and LOGICSTATE to the workspace.
- Connect GND, VCC, TestPin pins to the ground, power, and LOGICSTATE. Connect LED from pin OUT to ground through a resistor.
- Double click the infrared sensor and click the folder icon at the Program File box. Go to Local Disk (C:) > Program Files (x86) > Labcenter Electronics > Proteus 8 Professional > DATA > LIBRARY > InfraredSensorsTEP.HEX > Open > OK.
- Start the simulation
- If LOGICSTATE = 0, flame sensor not detect any flame. If LOGICSTATE = 1, flame sensor detect flame.
- LED ON when flame detected by a flame sensor and LED OFF when flame sensor not detected flame.
Steps (Flame Sensor with Arduino):
- Add Arduino UNO R3 component to the workspace
- Change flame sensor OUT pin to the pin 2 Arduino and connect LED from pin 13 to ground through a resistor.
- Click HERE to download the Arduino project code. Extract the project code and verify
- Copy the Hex file, then paste it into the Proteus Arduino board.
- Start the simulation
- LED ON when flame detected by a flame sensor and LED OFF flame sensor not detected flame.
Video:
If you have any suggestions, please write in the comment section. Thank you for your time 👷.
If you have any suggestions, please write in the comment section. Thank you for your time 👷.


No comments:
Post a Comment