
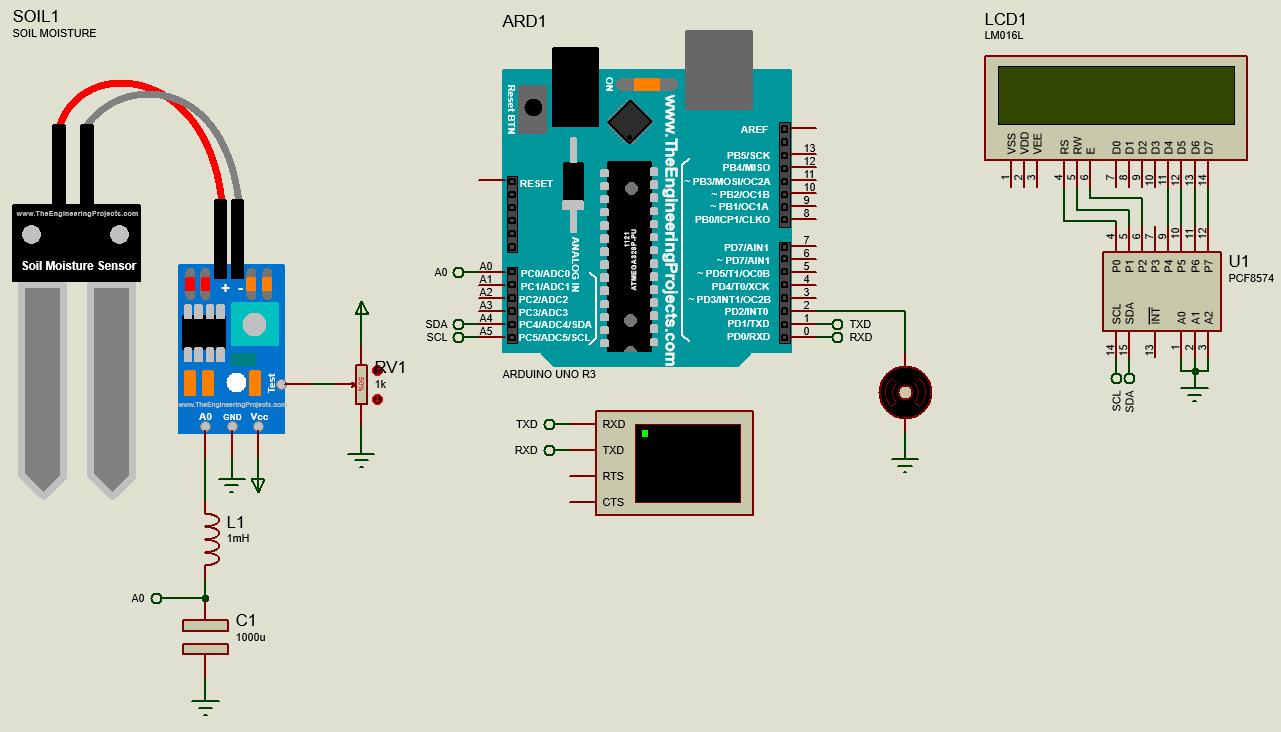
Today, I will share a simple automatic irrigation system using Arduino with Proteus 8 software. The soil moisture sensor is used to monitor the soil moisture level. Applications typically need soil moisture sensors such as irrigation schedules, fertigation systems, etc.

Related Post:
- Add Soil Moisture Sensor
- Add LCD I2C
- Add Virtual Terminal
References:
Components:
- Soil moisture sensor
- Inductor
- Capacitor
- Potentiometer
- DC voltmeter
- DC motor
- Virtual terminal
- LCD 1602
- I2C interface
Steps
- Open Proteus 8 software and add CAPACITOR, INDUCTOR, POT-HG, SOIL MOISTURE, MOTOR, ARDUINO UNO R3, LM016L, and PCF8574 components to the workspace.

- Wiring all the components according to the figure below.

- Double click the PIR SENSOR and click the folder icon. Go to Local Disk (C:) > Program Files (x86) > Labcenter Electronics > Proteus 8 Professional > DATA > LIBRARY > SoilMoistureSensor2TEP.HEX > Open > OK.

- Download the PROJECT file. Extract the project file and verify.

- Copy the Hex file, then paste it to the project file Arduino board.

- Start the simulation, and increase or decrease the potentiometer to change the soil moisture percentage %. If the soil is dry, the water pump is ON and OFF when the plant gets sufficient water. The LCD and serial will display the status "Dry" and the soil moisture level in percentage.

- If the soil is balanced, the water pump is OFF. The LCD and serial will display the status "Perfect" and the soil moisture level in percentage.

- If the soil is wet, the water pump is OFF. The LCD and serial will display the status "Wet" and the soil moisture level in percentage.


Video:
If you have any suggestions, please write in the comment section. Thank you for your time 👷.
No comments:
Post a Comment